Showing posts with label Desserts. Show all posts

Sunday, July 22, 2012

O.M.G. Banana Cream Pie

These days, it doesn't take much to inspire me to make something new in the kitchen.  I crave all sweet things!  I saw this post on Cupcakes and Cashmere and had to make it... immediately.  I love banana cream pie, so this recipe already captured my heart.  But a banana cream pie with an Oreo cookie crust?  Sounds like O.M.G. in my mouth.  And was it O.M.G., indeed!  I made this pie for a family gathering one sunny Saturday evening, and every single person that had a taste of the banana cream pie were raving about it.  I was shocked by the responses.  I'm not a great dessert maker, so I am quite glad that this turned out great!  Even my dad, who "grades" our cooking and rarely gives out anything above an A-, took a bite and shouted, "A+!!!!"  It is truly an amazing pie.  Please, I beg of you, give it a try!

Banana Cream Pie with Oreo Cookie Crust

Ingredients
Oreo Cookie Crust - 
- 2 cups crushed Oreo cookie crumbs
- 5 Tbsp butter, melted

Custard -
- 1/3 cup sugar
- 1/4 cup cornstarch
- 1/8 tsp salt
- 5 large egg yolks
- 2 1/2 cups whole milk
- 2 Tbsp unsalted butter, soften
- 1 tsp vanilla extract

3 ripe bananas, peeled, cut into 1/2-inch thick slices

Whipped cream - 
- 1 cup chilled whipping cream
- 2 Tbsp powdered sugar
- 1 tsp vanilla extract

- chocolate curls (optional)

Tools
- food processor
- whisk
- fine-mesh sieve
- wax paper
- peeler (optional, to get chocolate curls)

Steps
1. Make the crust first.  Grease up a 9 1/2 inch pie plate (if using a glass pie plate then there is no need).

2. Separate Oreo cookies from its' filling.  Crush the Oreo cookies with a food processor, until fine.

3. Mix the cookie crumbs with melted butter until moistened.  Dump it into the pie plate, spread it evenly over the pie plate, and press down nice and firm with a spoon.  Place in fridge for 30 minutes before baking for 10 minutes at 350 degrees.  Let it cool while making the custard.


4. Next, make the custard.  Heat milk in a heavy saucepan over moderate heat until hot but not boiling.

5. While milk heats, whisk together yolks, sugar, cornstarch, and salt in a heatproof bowl until smooth.

6. Add 1 cup of hot milk to yolk mixture in a stream, whisking, then add remaining milk, whisking constantly. Transfer mixture back to saucepan and cook over moderately low heat, stirring constantly, until thickened and registers 170F on thermometer, 6 to 10 minutes (do not boil).

7. Immediately force custard through a fine-mesh sieve into a clean bowl and stir in butter and vanilla. Cover the surface with wax paper, cool to lukewarm, about 45 minutes.


8. After the Oreo cookie crust and custard are cooled down, start assembling the pie.  Spread about 1 cup of custard in crust.  Top with sliced bananas, then cover the bananas with the rest of the custard.  Chill the pie for about 2 to 3 hours.


9. Beat chilled whipping cream, powdered sugar, and vanilla extract in a bowl to soft peaks.  Spread cream over pie.  Place in fridge for at least 1 hour and up to 8 hours.


10. Garnish pie with chocolate curls, if desired.  Cut into wedges and serve.

Serves 8 - 10.

Crumbly Oreo crust, eggy and sweet custard filled with bananas, and clouds of whipped cream.  Heaven.

Wednesday, June 27, 2012

Summer Dessert with Nectarines and Apricots

One of the common questions I get while being pregnant right now is: do you crave anything?  Sometimes I think long and hard about this because I don't really think I do.  I do not have crazy cravings such as pickles dipped in chocolate or fries dipped in ice cream (although I already do love this with McDonald's soft serve and their french fries... hmm, I want some right now), but I guess I do crave something, and I eat A LOT of it... fruits!!

This started back during my first trimester, when I avoided eating a lot of things because nothing seemed appetizing to me.  I felt like I had to force myself to eat my lunch or dinner (especially dinner... I just wanted to go to sleep!), but the only thing I enjoyed eating were fruits.  It was apples, oranges, and bananas at the time since it was winter.  Now that summer is here, I am a much happier pregnant lady!  I get to enjoy items such as watermelon, cantaloupe, pineapple, peaches, nectarines, plums, apricots, pears, cherries, and the list goes on and on... you know those Costco-sized watermelons?  I can eat one all by myself in less than a week.  I LOVE FRUIT!

My current love for fruits inspired me to make a quick dessert for the family last Saturday night.  I have sooo much fruit in my fridge, why not share?  This was a delicious and fulfilling galette, especially with a big scoop of Haagen-Dazs vanilla ice cream!

Nectarine and Apricot Galette
from Simply Recipes

A few variations...
...instead of using 2 peaches, I used 1 nectarine and 4 large apricots.
...mixed 2 tsp of sugar and 1/2 tsp of cinnamon together to get cinnamon sugar, and generously sprinkled the mixture on the crust (after the eggwash process) to give it a bit more of a sugary taste.  If you have coarse sugar, it's even better!
...I actually forgot the small chunks of butter to be placed on top of the fruits, but I don't think it mattered much.  You can opt out if trying to save some fatty calories (quite little though).

Happy fruits.

Alternating nectarine and apricot slices.  Fold the corners to wrap it all up!

Mouthwatering...

Saturday, April 21, 2012

Just Pictures: Tea Party For Our New Niece!

My older sister is having a second child, a girl (yayy!), and didn't want a baby shower this time around. Well, I made her have one.  A surprise tea party baby shower.

My sisters and I have been talking about holding a tea party for awhile now, an inspiration from my talented friend, Cin Cin Let's Eat's annual tea party (examples here and here). My younger sister and I planned this party together and decided on 3 savory sandwiches (my responsibility) and 4 sweets (sister's responsibility).

The menu...  
-- Curried Egg Salad --
(inspired from here, without the celery and green onions and added about 1 Tbsp of yellow curry powder to the mix of 8 eggs)

-- Chicken Salad (courtesy of Safeway, haha) --

-- Cucumber Sandwiches with herb butter, half with proscuitto on top --
(mix softened butter with chives and salt, thinly slice an English cucumber and nicely layer cucumber pieces on bread)

-- Raspberry Coconut Thumbprint Cookies --

-- various cupcakes from Frost Factory --

-- Passion Fruit Tart with Strawberries and Raspberries --

-- Fruit Salad (not pictured) --

The spread 

It was a fabulous time on a Sunday afternoon of April Fools Day.  We cannot wait for our little niece to arrive in the world (just a few more weeks, yeah!).


Sunday, February 5, 2012

Hmm Hmm Dulce de Leche

This cookie was started with the dulce de leche recipe I found online.  When I saw what was used to make the dulce de leche, I was immediately hooked.  Can you guess what tool was used??  Well, of course, a crockpot!!!  THE easiest recipe I've seen thus far, all you do is take a can of condensed milk (label off), drop it into a pool of water inside the crockpot, and turn it to low for 8 hours.  Ahh-maaa-zing!

Ginger Thumbprint Cookies with Dulce de Leche

From Chocswirl (ginger thumbprint cookies):

Just one variation...
...substituted molasses with maple syrup

Roll cookie dough into balls and gently push down the center.

And from The Culinary Chronicles (dulce de leche):

Simply exquisite dulce de leche

I know, the presentation of these cookies are not the best.  I may have used my thumb a bit too aggressively, and I blame it on the fact that I do not have piping materials yet!  Regardless, it was quite delicious.  Even my husband's coworkers agreed.

Friday, January 13, 2012

Peanut Butter, Banana... and Chocolate

I think I buy too many bananas.  Maybe because the bananas are stored in the corner of the kitchen, I don't usually see it and so I forget to eat it.  I am also pretty particular about my bananas - I like them more on the green side and harder than normally ripped bananas.  As soon as I see a few specks of black on the bananas, I would not eat them.  So what can I do with these really ripe bananas?  Bake banana items, of course!

Peanut Butter Banana Muffins with Chocolate Chips
adapted from Joy the Baker

A few variations...
...instead of making an entire loaf of banana bread, I used a 12-cup muffin/cupcake pan instead. 
...baked for 23 minutes at 350 degrees
...added chocolate chips!
...used plain greek yogurt (fage, the best!) instead
...didn't use ground flaxseed meal or dry roasted peanuts because didn't have any
...had left over batter after filling the muffin pan, so I took out my mini-muffin pan and made 8 more mini muffins (not pictured)


Friday, November 25, 2011

Just Pictures: Going Back For More Laduree

My dear friend from New York came back last month for our friend's wedding and she surprised me with one of the most wonderful things I have ever put in my mouth - macarons from Laduree.  It was fresh, decadant, and seriously one of the best macarons I have ever tasted!  These soft and delicate cookies had just the right amount of sweetness and flavor to it that you did not want to stop eating because it was hurting your sweet tooth, and trust me, I've had that happen quite often before with other macarons.  Laduree is a French-based company and they recently opened their first (and only, for now) store in the United States (in Upper East Side in New York).  Due to the high standards of Laduree (and thank goodness for that!), the macarons are flown directly from Paris three times a week to the store in New York.  No wonder these macarons are so wonderful!

Luckily, this discovery came in time for our New York trip, leaving today (yup, the day after Thanksgiving... are we crazy??) for a few days in the Big Apple to do two things: visit our friends and EATTTTTTT!!  It has been awhile since I've blogged about traveling, so I'm quite excited for this trip and am planning to take lots of pictures so that I can report back!  Stay tuned!

 Pretty box.

From left to right: Salted Caramel, a berry-type (seasonal), Orange, Strawberry, Pistachio, and Chocolate.  The salted caramel and the berry ones were the best!

Sunday, November 13, 2011

I Heart Panna Cotta

Someone should make a T-shirt that says that.  I love... adore... heart... panna cotta!  Needless to say, I am really excited to share this recipe.  I had some doubts before making this dessert because panna cotta tastes quite delicate, and so I thought the techniques to make this dessert were also delicate and complicated.  Boy, was I glad I was wrong!  It's so easy, so fast, and you just mostly let the refrigerator do the work for you!  I made this dessert yesterday for a "Pizza and Movies" night at our house, where we gorged on 3 different types of homemade pizza and watched Kung Fu Panda 2 and Crazy, Stupid, Love.  This dessert hit the ultimate happy spot my lucky belly!

Chocolate Hazelnut Panna Cotta
from Pinch My Salt

What I did...
...I found the hazelnut milk at Whole Foods (not too expensive, just $2.57!).
...added chopped hazelnut, lightly toasted on the stove.
...strawberries worked great with this dessert!   

Large raw hazelnuts from Trader Joe's.  I orginally bought these nuts to make hazelnut milk, but it came very handy for this dessert.
Nom Nomm
One for me, and one for... me again.

Wednesday, November 9, 2011

Pumpkin + Gingerbread

It's nippy outside.  I have to face the facts: winter is here.  It's mid-November, just about one and a half months left until the end of the year.  Lately, more of the food blogs I frequent are posting holiday-related recipes, and I am quite content with it since I love these flavors.  When I first saw this Pumpkin Gingerbread recipe, I didn't have any expectations of what the combination would taste like.  To be honest, I only reason I made this was to finish up the pumpkin puree leftover from the Halloween cupcakes.  The pumpkin gingerbread mini bundt cakes turned out to be fabulous... it was soft, full of pumpkin and ginger flavors, and not at all too sweet that will hurt your tooth!  I must be mastering the skill of combining dry and wet ingredients together because I am shocked at how moist this cake is!  Or I just got lucky.  Either way, give this recipe a try... you won't regret it!

Pumpkin Gingerbread Mini Bundt Cakes
from Simply Recipes

What I did...
...because I only had 1/2 cup of pumpkin puree left, I cut all of the ingredients in half .  I used minced ginger and substituted molasses with maple syrup.  Instead of vigorously whisking the dry ingredients together, I sifted the flour and spices.
...filled 4 mini bundt pans.
...bake for 25 minutes at 350 degrees.

The combination of pumpkin and gingerbread flavors were like bursts of the holidays in my mouth!

Monday, October 31, 2011

BOO! It's Halloween!

Ahh... Halloween.  The time for kids to go on an endless sugar high, for parents to drag their kids around at night, and for those in-between to assume another identity and let their "other" personalities come out!  I've always enjoyed Halloween and this year is no different.

My department is holding a Halloween party this year and I'm pretty darn excited because of all the activities!  There will be three contests for everyone - costume contest, pumpkin carving contest, and a cupcake contest!  I immediately signed up for the cupcake contest and later signed up for the pumpkin carving contest after my coworker convinced me.  Good thing she did because I had a lot of fun carving different jack 'o lanterns on the pumpkin.  Three hours of hard and laborious work, but it was well worth it...

As you know, I've been trying hard to become a better baker, so this cupcake contest provided more of a motivation to do well (competitive much?).  In the days leading up to it, I have been researching cupcake flavors, frosting ideas, and Halloween-themed designs.  I also knew I had to do a test batch to make sure it will turn out edible and presentable because I did not want to start on the Sunday before and end up with disastrous results and no cupcakes to offer the next day.  The practice run was a great idea because for the second time around, I knew exactly what I was doing and the cupcakes turned out refreshingly moist and delicious!  The cream cheese frosting was just sweet enough and paired well with the pumpkin-flavor cake, and the finely chopped chocolate chips were a wonderful final touch to the cupcakes.  I hope the judges will like it.  Wish me luck everyone!

Happy Halloween!!

Pumpkin Cupcakes with Maple Cream Cheese Frosting

Pumpkin cupcakes from Ina Garden for HouseBeautiful
...I doubled the recipe to make bigger and plumper cupcakes.  It yielded 20 cupcakes.

Gently fold the flour mixture in the wet mixture until just combined.  The final batter should be thick and lumpy.

Use a cookie scooper to fill the pan, and use the back of the scooper to "round out" the batter so that you can get a good-lookin' cupcake!

Maple Cream Cheese Frosting adapted from Ina Garden for HouseBeautiful
Ingredients
- 9 oz cream cheese, room temperature
- 3 Tbsp unsalted butter, room temperature
- 1 1/2 cup powdered sugar
- 1 tsp vanilla extract
- 2 Tbsp maple syrup

Decoration:
- 1 cup semi-sweet chocolate chips, finely chopped
- 18 ghost marshmallow peeps

Tools
- electric mixer
- food processor

Steps
1. Cream the cream cheese and butter on low until softened.

2. Pour in maple syrup and vanilla extract.  Slowly stir in powdered sugar until softened.

3. Chop the chocolate chips in the food processor until fine.  Lay chocolate on a plate for dipping.

4. Take the ghost marshmallow peeps and cut about 1/4 to 1/3 inch of marshmallow from the bottom of the ghost.

5. Frost your cupcakes!  Once frosted, turn the cupcake upside down and dip the frosted cupcake in the chocolate.  Make sure the chocolate is abundant across the surface area of the cupcake (for mimicking dirt) and place a ghost peep on top of the cupcake.  If the ghost peep is not stable, spread a little bit of frosting on the bottom to ensure it stays on top of cupcake.  

The ghost peeps say, "BOO! I dare you to eat me!"

Tuesday, October 25, 2011

Chocolate Cupcakes - Moist and Delicious

I am working really hard to become a mediocre baker.  I am not even aiming for to be a great baker, because that is reaching far beyond the stars, but just one that can pass by from time to time.  Not exaggerating, but 8 out of 10 times, I would fail at baking something.  The end product would be too hard, too watery, or just too disgusting to eat.  I would stare at the pile of baked goods sitting in my trash can with sadness and wonder where did it all go wrong?! 

Lately, I have been failing more than succeeding.  I recall about a month ago, I was trying out a new muffin recipe, after making multiple delicious batches of other types of muffins, and I failed horribly.  Giving this some thought, I came to the conclusion that I am too ambitious about baking.  For savory dishes, I would typically look at the ingredients and how long it would take to make it.  If everything works out, then I would attempt to make the dish.  I took the same approach with baking.  Most of the ingredients are easy to find - flour, baking soda, baking powder, milk, oil, etc. - and it only takes a few minutes to incorporate everything together.  But what I forget are the skills and techniques that go into every batter.  Beat, stir, fold... I may think I know what they mean, but I most likely do not perform them correctly!  My goal now is to start small, tiny baby steps, with baking.  No more ambitious recipes or complicated techniques.  I hope my husband has the appetite because more are coming!

Moist Chocolate Cupcakes
from Simply Recipes

The results?

Chocolate cupcake: easy to make, moist and delicious, just as promised.  I opted to cut out some sugar, from 1 cup to 3/4 cup.

Chocolate frosting: major FAIL.  I think where I went wrong was that I wanted to cut the recipe in half, and I did that with everything, except for the cocoa (old brain, forgot).  It ended up making the mixture really thick, which I tried to compensate by adding the other half of the butter and putting it back on the stove for melting, and this became a downward slope towards frosting failure.  Another strike added to my record.  Instead, I sprinkled powder sugar and placed a piece of strawberry on top.  It's healthier, right?


Saturday, August 13, 2011

Sweet Almond Cookies

I found another recipe from the archives.  These delicious and buttery cookies were made about 3 years ago for our housewarming party (wow, it will be 4 years this November since we've moved in to our house!).  I need some type of ocassion to make them again.

Almond Cookies
from Simply Recipes

I made a few changes to the recipe:
- used ground almonds (thanks to food processor)
- used 2 tsp of vanilla extract because didn't have any almond extract
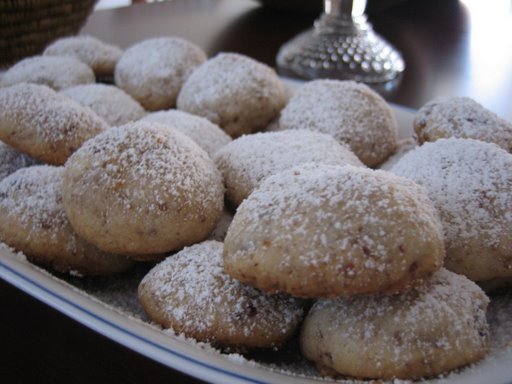
- rolled into balls instead of molding into crescents. 

Mix mix mix...


All ingredients added and mixed, ready to be placed on baking sheet.


Hand-rolled cookie balls ready for the oven.


Serves many happy people! :)

Tuesday, August 2, 2011

Blueberries... and Cake and Cake!

Mini Blueberry Bundt Cakes
from Rasa Malaysia

These cakes were made following the exact recipe but I had changed a couple of steps due to the type of pan I was using.  The recipe called for a bundt pan (regular size) but I only had mini ones.  I searched online and learned to fill up the mini pans about half way, and only bake them for about 20-25 minutes in the oven.  Set at 20 minutes and use a toothpick to see if the middle is dry.  If not, set for 2-3 more minutes and check again, until toothpick is dry.

Makes 12 mini cakes.

I packed a few away for my mom and sisters.

Thursday, March 24, 2011

Apple Cinnamon Buttermilk Cake

On certain days, you may crave a large and heavy chocolate-type dessert that will hurt your teeth with every bite, and at times you crave a light yet sweet and fulfilling item to satisfy that sweet tooth.  If you feel like the latter, the below dessert is for you.  With a few simple ingredients of apples, cinnamon, and buttermilk, you will end up with a deliciously fluffy and satisfying cake. This cake will not bring you "eater's remorse" if you end up inhaling two or three slices in one sitting!  Top it off with homemade whipped cream, it is the dessert to turn to when you just want to divulge in cake without feeling too guilty. 

Apple Cinnamon Buttermilk Cake
from Pinch My Salt

Tuesday, November 30, 2010

Sweet Red Bean Soup (紅豆湯)

A favorite of mine during the winter time, this warm sweet red bean (aka 紅豆 or azuki bean) soup with homemade glutinous rice balls (小湯圓, made pink and white just like ones you can buy at the store!) reminds me of the cold winters when I was young, and brings a smile to my face... probably due to the side effect of a slight sugar high!
Sweet Red Bean Soup (紅豆湯)

Ingredients
Soup:
- 1/2 cup dried red beans, rinsed
- 3 cups of water for boiling the beans; 2 cups for the soup
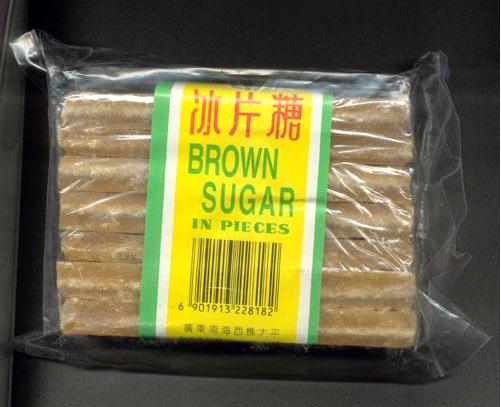
- 2 blocks of Chinese brown sugar


Glutinous Rice Balls:
- Two 3/4 cup of glutinous rice flour (糯米), separated into 2 bowls


- 1 tsp red food coloring
- warm water

Steps
1.  Rinse the red beans and place beans and 3 cups of water in a pot to boil.  Once it boils, bring the heat down to low and let it simmer for about 2 to 2.5 hours (yes, these darn beans are super hard and takes a long time to cook!).  Stir beans occassionally.  Note: ensure water is not being boiled off too quickly!

2.  Meanwhile, make the glutinous rice balls by placing 3/4 cup of glutinous flour in a bowl.  Do this again for the second bowl. 

3. Make the white rice balls first by placing about 1 Tbsp of warm water in the bowl and mix with a spoon.  Mix well until a dough forms.  Add flour or water, as needed.  Pinch a small piece from the dough and rub softly against the palms of your hand to roll into a small ball.  Place the ball on a floured plate, separated out and not touching each other.  Repeat until all dough is used to make small rice balls.
4.  Make the red glutinous rice balls by adding 1 tsp of red food coloring to the second bowl of glutinous flour.  Repeat Step 3 above.

5. Immediately place the rice balls in the freezer to freeze (still ensure each rice ball is on the floured plate and not touching each other).
(Pile of rice balls after they are frozen)

6. Once the red beans have been thoroughly cooked and is soft, add about 2 or more cups of water (a lot of the water have been cooked off, so you want to replace them).  Place 2 blocks of Chinese brown sugar (if this is too sweet for you, add some more water).  Cook until brown sugar dissolves.

7. In a separate pot, bring water to boil and toss in the frozen glutinous rice balls.  Cook until all rice balls float to the surface of the water.  Scoop about 2-3 spoonfuls of red bean soup into a bowl.  Using a slotted spoon, scoop desired amount of rice balls and place in the soup bowl.  Now enjoy!

*For the remaining rice balls, use the slotted spoon and place them in the pot of red bean soup.  The next time you enjoy the dessert, the soup and rice balls can be heated up together.