Showing posts with label Chicken. Show all posts

Friday, December 30, 2011

Annual Holiday Dinner - Main Entree #1

For the past 6 years, my husband and I have been holding an annual holiday dinner with our close and dear friends.  Wow, I didn't even realize how long it has been until I had to think about it!  I love hosting this dinner because we get to unite under one roof, especially with friends coming home from New York.  As we go through our daily grind of work and life during the year, the holiday season is a great excuse to spend a little more time together, and not to forget, to stuff our faces to the maximum!

In the past, I have tackled roasted chicken, beef roast, and different types of pasta.  This year, I got the crazy idea (I think it came to me in a dream) to be ambitious and cook something unfamiliar to me: frying.  I figured that if I was to go all out and serve a fried main entree, I might as well make something amazing.  I chose Thomas Keller's famous Buttermilk Friend Chicken from Ad Hoc.  The result?  Oh My Goodness.  I've never tasted the actual fried chicken from the restaurant, but if it's as good as the ones I made, Oh My Goodness!

Thomas Keller's Buttermilk Fried Chicken
from Ad Hoc at Home

I also found this recipe online, at this blog.

Because of my unfamiliarity with frying, I held a kitchen "test run" the weekend before the holiday dinner.  A few lessons learned:

  • I messed up on the salt measurement and the chicken turned out to be much saltier than I would have liked.  
  • I decided to fry outside (as to spare my house from being filled up in oil fumes), so I used our side burner on the BBQ grill.  Keeping the oil at a constant 320 degrees was challenging.  Although difficult, we watched it carefully and all of the chicken came out cooked and delicious.  
  • There are different cooking times for different parts of the chicken.  Drumsticks and thighs are about 12 minutes at 320 degrees, and breasts and wings are about 8 minutes at 340 degrees.  This was explained in the recipe book, but as it was near the end of the page, I stopped reading midway through (bad habit of mine).  I cooked the breasts and wings also at 12 minutes and although not overcooked, the outside was much crispier and darker than the rest.


Lots of chicken drums and thighs, laying out to dry after 12 hours of brining.  As Thomas Keller stated in the book, the chicken brine is KEY!  Chicken pieces dredged in the spiced flour mixture.

I used peanut oil to fry.  Look at it go!  And they all came out golden and crisp!  Another important tool to have is a deep fry thermometer.

Yum yum yum.

I have a vegetarian friend so I typically serve 2 main entrees at the holiday dinner. Main entree #2, a vegetarian item, will be featured in the next post!  Stay tuned!

Wednesday, October 5, 2011

Happy Birthday with Crock Pot Chicken Pho

Happy Birthday S!  It's my younger sister's birthday today, another year to add to her late twenties.  Ever since I can remember, my family holds a strong tradition for birthdays and eating noodles.  For a long, long life of the birthday family member, we must congregate and eat noodles the day (or a few) before a birthday.  It's a big "no no" if the noodles are eaten the day of or after a birthday!.  As an avid noodle-lover such as myself, I have no complaints about this particular family tradition.

There are also other rules to the tradition, such as while eating the noodles, one must not chew off and break the noodle strand in order to ensure a long and wonderful life.  Or if a family member is elsewhere and cannot join the noodles dinner, then that member must try their very best to eat noodles on the same day.  Over the years, the tradition of birthday noodles also turned into a strict set of menu.  The birthday member typically has a choice of 3 different types of noodles: Za Zang Mien, Lian Mien aka Cold Noodles (if you have a birthday in the summertime), and Beef Noodle Soup, as explained here.

However for this birthday, I volunteered (or was I commanded by S?!) to make birthday noodles for the entire family.  I wanted to change things up and Chicken Pho instantly came to mind.  To be honest, this is really just another excuse to use my handy-dandy crock pot.  I put all the ingredients together and turned on the crock pot to high on an early Sunday afternoon, and by that evening, my kitchen was filled with the distinct smell of pho, which was all worth the wait.

Slow-Cooked Chicken Pho with BBQ Chicken
Chicken Pho from Jaden Hair of SteamyKitchen for Bon Appetit

Optional Ingredients:
- 2 stalks green onions, finely chopped
- Hoisin sauce
- Sriracha hot sauce

A few tips...
...I used parts from a whole chicken - chicken wings, gizzards (except for liver), and the entire chicken body after separating the breasts, legs, and excess skin.  Since you are just cooking the broth, save the good parts for something else and use as much as the miscellaneous parts as you can.  I used the chicken breasts for the BBQ Chicken portion of this recipe.
...I did not use whole coriander seeds because after I had put all the ingredients in the crock pot, I realized I did not have this ingredient.  I made beef pho before so I thought I had all the spices, but apparently, chicken pho is a little different.  Even without the coriander seeds, it still turned out tasty.
...for my crock pot size and amount of water, it took 5 1/2 hours to cook the broth.  The longer, the better.
...remember to salt your broth when it's close to done.  The recipe doesn't include any salt but to have a tasty bowl of pho, use salt!

BBQ Chicken adapted from Vietnamese BBQ Pork Salad, Savory Sweet Life

Ingredients
- 2 chicken breasts
- 1 Tbsp soy sauce
- 1/4 cup fresh lime juice
- 2 Tbsp fish sauce
- 1/4 cup water
- 2 Tbsp of olive oil
- 2/3 cup sugar
- salt and pepper to taste
- 1/2 onion, roughly chopped

Steps
1. Combine ingredients except for chicken and onions in a bowl.  Put bowl in microwave and ensure all the sugar melts.

2. Place chicken and onions bowl and marinate for at least 1 hour.

3. Grill chicken breasts over medium heat and cook until done.  Let chicken sit for about 5 minutes and cut into slices.

When the broth and BBQ chicken are done, assemble pho with soup, noodles, BBQ chicken slices, bean sprouts, sliced onions, green onions, and cilantro.  Pair with hoisin sauce and Sriracha hot sauce.

Serves 4-6.

Monday, August 15, 2011

Chicken From A Crock Pot

Have you ever been intimidated with cooking a whole chicken?  Well, with a crock pot, you don't have to be.  The only messy part you have to deal with is cleaning out the chicken, because the pot will take care of it all and put your headache to rest!  The chicken comes out full of flavor and falls of the bone so quickly that you don't even have time to catch it.  Yes, let's all drool a little...

Slow-Cooked Whole Chicken

Ingredients
- 1 ~3 lbs whole chicken
- 1 large yellow onion, roughly chopped
- 4 stalks of green onions, roughly chopped
- 1/4 cup soy sauce
- 2 Tbsp dark soy sauce
- 2 Tbsp sesame oil
- 1 Tbsp salt
- 2 tsp black pepper

Tools
- crock pot

Steps
1. Place chicken in a large contain and add chopped onions and green onions.  Combine liquid ingredients, salt, and pepper and rub all over chicken.  Marinate chicken for about 12 hours (or overnight) in the refrigerator.

2. Place chicken, vegetables, and liquid goods in the crock pot and turn on High.  Cook for about 3 hours.  Use thermometer to check if chicken is done. (Wow, two steps?  That's it??)


Serves 6-8.

Just one tip...
...because the chicken is slow-cooked, it is very tender and very delicate.  I had some issues taking the chicken out of the crock pot without breaking up the entire chicken.  In the end, I used a straight meat fork and the outside part of the tongs to carefully (and I mean really carefully) take it out.  Just use a little patience and steady hands.


Blanched green beans and chicken... a great combo.

Sunday, July 24, 2011

Sesame Oil Chicken

Chicken has been widely available in our household for awhile.  After making many baked chicken dishes, which is really my lazy way of making a home-cooked meal after a long day at work, it was getting pretty old. I started to browse cooking blogs again to find inspiration, and I found it at Rasa Malaysia. After making this simple yet tasty dish, I am excited to try many more from this website.

Sesame Oil Chicken
from Rasa Malaysia

I paired the dish with noodles and sauteed vegetables.

Tuesday, April 12, 2011

Chicken with Capers Sauce

This entree is a typical meal I would cook on a weekday, given limited time I have to prepare a grand and glorious meal after work hours and after an intense workout (seriously, by the time I can cook, it is close to 8 already...).  I prepared this meal within 30 minutes and we scarfed it down within 10.  The capers sauce really added a special touch to the grilled chicken breasts, which can be dry and flavorless if not prepared correctly.
Chicken with Capers Sauce
from Simply Recipes

A few tips...
...do not overcook the chicken breasts!!  I've learned this lesson over and over again, but since these breasts are sliced thinner, cook it just enough so that it is not pink in the middle and take it off the stove immediately!
...although the recipe called for cooking off most of the liquids in the capers sauce, I found that it left you without much "sauce" to pour over the chicken.  The liquid was actually quite flavorful with the onions and capers (I choose chicken stock instead of white wine, although I think the white wine would have been that much better), so I would suggest not to burn off that much liquid.  Also, the extra liquid would make your chicken more juicy!

Sunday, April 3, 2011

Chicken and Mango Chutney

To me, mango is a precious and delicate fruit that only on occassion, I treat myself to it.  This big chunk of flavorful, sweet, and juicy goodness makes me happy every time I take a mouth-filling bite.  To quote my three-year-old nephew today at dinner, after he slurped down some oily and salty juices from a vegetable dish, "the fairies in my stomach are very happy now!"  He doesn't make a lot of sense sometimes (lord knows what goes on in a three-year-old's head...), but it was beyond hilarious, and true!  The fairies in my stomach really loves mango!
Chicken and Mango Chutney
from Simply Recipes 

Not much was altered from the original recipe, so please click on the link above for ingredients and steps.  The only items I didn't have were candied ginger and mustard seeds, so I just didn't add any.  It still came out tasty.

Sweet and tangy... delicious!

Tuesday, November 2, 2010

Chicken Stock

Making chicken stock is like knowing how to tie your shoes or drive a car - it is a necessity to (well, for carnivores) cooking.  I use chicken stock in most of my cooking as it adds that extra flavor than plain water would, and I just love it for any Asian noodle soups.  It's easy to make because you can just leave it for hours to simmer while you go off to do something else!

Chicken Stock

Ingredients
- 2 large chicken leg quarters
- 3 quarts of water
- 1/2 yellow onion, roughly chopped
- 3 stalks of celery, cut into 4 pieces
- 1 carrot, rough chopped
- 1 bay leaf
- 1/2 tsp black peppercorns
- salt to taste

Tools
- stockpot
- colander

Steps
1. Chop up chicken quarters into 3 inch chunks (this makes it easier to cook the meat).  Place chicken pieces in a large stockpot with enough water to cover. Bring to boil over high heat and cook for 5 minutes to get rid of blood particles. Drain, reserve the meaty bones, and rinse the pot well.
2. Return chicken pieces to the same stockpot, add 3 quarts of water, onions, celery, carrots, bay leaf, and black peppercorns.  Bring to boil over high heat, and then reduce heat to low.  Let simmer for 3 hours until around 2 quarts.  Ocassionally skim off any foam from the surface.  Salt broth to taste.  Strain and discard solids, reserving the meaty bones to pick on if desired.
Yields about 2 quarts
 
A few tips...
...cool the stock first before draining.  From experience (sadly), you don't want hot steam hitting your face if you are pouring when the stock is still boiling hot!
...if you are using this chicken stock for soup or noodle soup, reserve the chicken meat.  Peel meat off the bones and place back into the stock.  This way you can get extra protein!
...you may not be able to use all the chicken stock in one sitting, so save some in a container and put it in the freezer.  To be safe, the stock can be good up to about 2-3 weeks.  Take it out to defrost when needed.

Tuesday, October 26, 2010

Teriyaki Chicken and Udon (Victory Noodles?)

This past weekend was a free weekend for us in quite awhile.  No obligations, no going to SF to visit the in-laws, no going to Sunday dinner with my side of the family, and the rain was more of a reason to stay in and do nothing.  Not having done grocery shopping for more than a week, it was pretty slim pickings in the kitchen.  Did I wanted to brave the wind and rain and go out to gather more fresh ingredients?  Nahhh... I decided to scrounge up what I can, which resulted in this udon dish.

Thank goodness, the end result was surprisingly good.  I may even dare to dub these "Victory Noodles" because we enjoyed scarfing this down while watching the SF Giants win to go on to the World Series!  For the hubby: Go Giants!!!

Teriyaki Chicken and Udon
Ingredients
Teriyaki Chicken:
- 2 pieces of chicken breast, cut into cubes
- 1/4 yellow onion, sliced
- 1 clove of garlic, minced
- 2 Tbsp teriyaki sauce (I used Soyaki from "Trader Joesan", I highly recommend this sauce!)
- 1 scallion, chopped
- 1 Tbsp olive oil
- salt and pepper

Udon:
- 2 packs of udon noodles, frozen (make sure the noodles are frozen when placed into the water to cook, this way the noodles are firm (or "Q Q the") when done!)
- 1/2 tsp Hon Dashi Bonito Fish Soup Base


Tools
- pan or wok

Steps
1. Place chicken, onion, garlic, and Teriyaki sauce in a bowl and mix well.  Put aside to let it marinate for about 20 minutes.  Chop scallions in the meantime.

2. Heat a pan or wok on high heat with 1 Tbsp olive oil.  Saute the marinated chicken for about 10-15 minutes until done.  Salt and pepper to taste.

3. Fill a pot with water and place on high heat.  Once boiling, place the frozen udon noodles and cook for 2-3 minutes.  The water may not be boiling after two minutes, but the noodles are cooking, don't worry!  Take out the noodles and place into a bowl.  Add bonito fish soup base and mix well.  Place udon first on a plate and then teriyaki chicken on top.

Serves 2

Saturday, October 23, 2010

Arroz Con Pollo

I know, it's been a loooong while since I posted.  Things (mostly work, argg) have been crazy... so crazy that my kitchen was collecting dust for a few months.  So sad, so sad...

I actually made the below dish awhile back when things were "sane" and just never got the chance to share it.  What I love most about this dish is the chicken flavors and fat cooked into the rice.  If you want a hearty warm meal (really perfect for the fall weather right now...), then give this dish a try!


Arroz Con Pollo
from Simple Recipes

Ingredients
Chicken:
- 1 Tbsp olive oil
- Half of a whole chicken (chicken wings, thighs, breast)
- 1/2 cup flour for dredging
- salt, pepper, and paprika for flour
Rice:
- 2 Tbsp olive oil
- 1/2 yellow onion, chopped
- 1 garlic clove, minced
- 2 cups of medium or long grain white rice
- 3 cups of chicken stock*
- 1 Tbsp tomato paste or 1 cup of fresh diced tomatoes or canned tomatoes
- pinch of oregano
- salt to taste

*Check the instructions on the rice package for the proportions of liquid to rice.  They can range from 1:1 to 2:1.  If your rice calls for 2 cups of water for every cup of rice, then for this recipe, use 4 cups of stock for 2 cups of rice.

Steps
1. Heat 1 Tbsp olive oil in a large skillet (a skillet that has a cover) on medium high heat. Put the flour in a wide bowl, mix in a generous sprinkling of salt, pepper, and paprika. Dredge the chicken pieces lightly in the flour mixture and put in the pan to brown. Cook a few minutes on each side, just enough so that the chicken has browned. Use a slotted spoon to remove from pan and set aside.

2. Add the rice to the pan to brown. Add a little more olive oil if necessary. Stir first to coat the rice with the olive oil in the pan. Then don't stir too much or you will prevent it from browning. Let it brown and then stir a little to let more of it brown. Then add the onion and garlic. Cook the onion, garlic and rice mixture, stirring frequently, until the onions have softened, about 4 minutes.

3. Place the chicken pieces, skin-side up, on top of the rice. In a separate bowl, mix together the stock, tomato, salt, and oregano. Pour the stock mixture over the rice and chicken. Bring to a simmer, reduce the heat to low, and cover. Cook for 20-25 minutes, depending on the type of rice and the instructions on the rice package, until the rice and chicken are done. Fluff the rice with a fork. Add more salt and pepper to taste.
Serves 2-4.

Monday, April 5, 2010

Spicy Orange Chicken (No, Not Panda Express-like!)

Whenever I see the words "orange chicken" I imagine these bright orange-looking chicken pieces sitting in a heavy sweet sauce at the Panda Express in the nearby mall.  I know I don't make it sound appetizing, but I actually like it.  Who doesn't like chicken-like meat deep fried and smothered in a sweet tangy sauce?  And on top of a big mountain of greasy chow mien?  Yum!  It's the ultimate fast food!

Last night I made these spicy orange chicken thighs as to keep up with the orange-themed recipes.  I still have so many oranges left, even though many have been shared already.  Maybe I need to stop picking them... but it's oh so fun :P.  I didn't have many expectations as to what they would taste (I just hoped it would be edible), but it was surprisingly delicious!  The must-have ingredient of this dish is the chipotle chili peppers in adobo sauce (do not substitute or skip it!).  I actually googled this ingredient because I had no idea what I should be looking for in the market.  Working with new ingredients is adventurous and fun at the same time.  The chicken was filled with sweet yet spicy flavors of the peppers and it worked well with the oranges.  I paired the meal with a fresh spinach salad of strawberries, pieces of pomelo (yes, individually handpicked by moi, hard work man!), and chopped pimento olives mixed with store-bought red wine vinaigrette dressing.


Spicy Orange Chicken
adapted from Orange Marinated Chicken, Simply Recipes

Ingredients
- 2 pounds chicken thighs or drums, skin on
- 3 oranges, peeled and seeded, coarsely chopped (or 1-1 1/2 cups fresh squeezed orange juice)
- 1/4 onion, chopped
- 2 whole chipotle chili peppers (in adobo sauce)
- 2 small cloves garlic, coarsely chopped
- about 1/4 cup chopped fresh cilantro
- 2 tsp fresh rosemary leaves, chopped (or 1/2 tsp dried)
- 2 tsp fresh thyme leaves (or 1 tsp dried)
- 2 tsp fresh marjoram leaves (or oregano, or 1/2 tsp dried of either)
- 1 tsp salt
- 1 Tbsp butter, melted

Tools
- food processor or blender
- gallon-size freezer bag or large container with lid

Steps
1. In a food processor or blender, combine the chopped oranges, onion, chipotle in adobo, garlic, cilantro, rosemary, thyme, marjoram, and salt. Pulse a few times to make a coarse purée.
2. Combine chicken thighs and the orange marinade together either in a ziplock freezer bag or container. Refrigerate for a few hours (or overnight).

3. Preheat oven to 425°F.  Remove marinated chicken thighs and wipe off excess (but not all) and place in a baking pan.  Melt butter and pour butter over chicken pieces.
4. Bake for a total of 50-55 minutes, until the skins are crispy brown, and the chicken is cooked through, juices running clear (thighs have an internal temperature of 175°F).  Let rest, covered in foil, for 10 minutes before serving.

Serves 2-3.

Saturday, April 3, 2010

Lemon Chicken

Trying to get my groove back like Stella (feels like its been ages since I posted a homecooked meal), here is a simple chicken recipe consisting of lemons and herbs taken from my go-to food blog Simply Recipes.


Lemon Chicken
taken from Lemon Chicken, Simply Recipes

Ingredients
- 1-2 pounds of chicken thighs, legs, and/or breasts, skin on
- 1 Tbsp of lemon zest
- 1/6 (just take a 1/3 cup and only fill half of it) cup of lemon juice
- 1 garlic glove, crushed
- 1 Tbsp of fresh thyme, chopped (or 1 tsp dried)
- 1 Tbsp of fresh rosemary, chopped (or 1/2 tsp dried)
- 1/2 tsp salt
- 1/2 tsp black pepper
- 1 Tbsp butter, melted
Tools
- freezer bag or plastic container with lid
- baking dish
- pastry brush

Steps
1. Place lemon juice, lemon peel, garlic, thyme, rosemary, salt, and pepper in a small bowl, whisk to combine. With the tip of a sharp knife, cut into each chicken piece one or two times by about 1/2 an inch. (This will help the marinade penetrate.) Place the chicken pieces and the marinade in a freezer bag or plastic container with a lid. Rotate the bag/container so that all chicken pieces are coated with the marinade. Seal the bag/container and place in the refrigerator (if using a plastic bag, place bag in a bowl in case of leakage). Let marinate for at least 2 hours.

2. Preheat oven to 425°F. Remove chicken from marinade and place in a single layer in a baking dish, skin side up. Use a pastry brush to brush a little melted butter on to each piece of chicken.
3. Bake for a total of 30 minutes, until the skins are crispy brown, and the chicken is cooked through, juices running clear (breasts have an internal temperature of 165°F and thighs 175°F).

Depending on the size of the breasts, they may be ready before the thighs, so if you are cooking a mix of chicken parts, keep that in mind, you may have to take them out of the oven before the thighs.

Let rest, covered in foil, for 10 minutes before serving.

Serves 2, alone or with white or brown rice.

A few tips...
...I didn't have any fresh herbs or those specific dried herbs available, so I used the next best thing I can find in my kitchen cabinet - Italian Seasoning (a mix of 7 different herbs, including thyme and rosemary!).  If you don't have those herbs, you can try to find something close.  It's OK if you don't have exactly thyme or rosemary, or only have one.
...when dealing with raw chicken, remember to wash your hands before you touch anything else.  Say no to E.Coli!
...make sure the chicken is cooked thoroughly.  When in doubt, take out the chicken and cut it through with a knife.

Monday, October 6, 2008

Long-Promised Chinese Cold Noodles

In my first entry I had stated that one of these days I will attempt to make Lian-Mien aka Cold Noodles with my mom's simple recipe. Although I did this many many weeks ago, today is the day I will post the recipe (::crowd cheering::).

Lian Mien (Cold Noodles)


Ingredients (not all pictured)
- 1/4 cup of soy sauce
- 1-2 large cloves of garlic
- 1-2 TBSP of rice vinegar (adjust to taste)
- 1/4 cup of water + 1 TBSP of sugar
- 4 TBSP sesame sauce + water + pinch of salt (amount of water adjusted to thickness of sauce)
- 1 shredded chicken breast
- 2-3 shredded japanese cucumbers
- chili oil (adjust to taste)
- 1 TBSP of sesame oil
- Noodles (enough for 2 servings) - I use Quon Yick (very common) but use any medium-sized noodles for this dish. Thin noodles, such as egg noodles, would not taste very well.

Serves two.

Steps


1. Noodles - boil the noodles to "al dente" and immediately dump the noodles into a colander to let cool. Rinse the noodles with cold water for ~ 30 seconds. After most of the water have been shaken off, move the noodles to a bowl and add 1 TBSP of sesame oil. Mix well. Let it sit to cool off some more.


2. Chicken - cook the chicken breast in hot boiling water for ~20 minutes. Check to make sure the chicken is cooked through before taking it off the stove. Let the chicken breast sit for a few minutes and start the shredding by hand. Yes, one by one is the way to go! I usually will assign this task to someone else (my husband is the lucky one in this case!).

3. Japanese cucumbers - I highly recommond using Japanese cucumbers because they're so crisp and delicious. You can find this in Japanese or Chinese supermarkets. Shred them using your food slicer/shredder.

4. Soy sauce + garlic - place the specified amount of soy sauce and diced garlic into a small bowl. Depending on if you're a garlic lover or not, you can add more garlic and make the portion 1 to 1. You will just have really garlicky breath after the meal.

5. Sugar water - Melt the sugar in semi-hot water in a small bowl (I do the microwave way - it's so much easier!) The sugar water should not be syrup-y or too sweet. The sugar water will help balance out the vinegar and soy sauce.

6. Vinegar - there is no preperation for this ingredient. Just bring the tablespoon to the table and add about 1 - 2 tablespoons to your noodles... adjust to taste!

7. Sesame sauce - last but not least, the most important ingredient of this meal is the sesame sauce. This is pure sesame paste that can be found at the Chinese supermarket. Place the sesame sauce in a small bowl and add about 1 TBSP of water to the sauce, stir, and add more water until the paste turns into a thick sauce-like consistency. Don't worry - if you add too much water, you can always add a bit more paste to get the thick consistency back. Add a pinch of salt for flavor.


To eat:
You prepare the cold noodles for eating by mixing EVERYTHING together! First scoop the amount of noodles you want to eat. Start off with adding 2 TBSP of sesame sauce, 1 TBSP of sugar water, 1 TBSP vinegar, 1 TBSP of soy sauce/garlic combo, some chicken and japanese cucumbers. Add a few drops of chili oil if you like your noodles with a kick. The noodles should have a light coat of sesame sauce to every inch, it should be salty enough for you, and overall have a flavorful and garlicky taste! Add more of any of the ingredients to accomodate your taste buds. I hope this turns out good for you - enjoy!

Monday, August 18, 2008

Fulfilling and Educational

This weekend I ate some yummy stuff and saw some interesting things. It was fulfilling and educational! :)


I found this interesting fruit in Chinatown so I had to be the tourist and bust out my camera! Thanks to google, I found out what it is: rambutan. It's like lychee or logan... darn, I should have bought some because I love lychee! Nice, I learned something.


We also stopped by San Mateo's Sweet Breams for a yummy taiyaki snack. We got one of everything - azuki (red bean), vanilla, chocolate, nutella, and coconut (flavor of the week). I think there was also an extra one that they snuck in there, and it tasted like custard. That was a good idea and a nice suprise. The shop was cute (they were showing Totoro), the service very nice, and the taiyaki good, but I felt that the price for this snack was waaaay too expensive for what you get! 6 for $3.25 and 12 for $5.50. That's about $0.45 - $0.54 for ONE! And it really is pretty tiny!


I finally got what I was craving for for weeks - gyro salad! After a nice walk around the farmer's market and scored some big and fresh fruits and veggies, we stopped by Gyros House in Mountain View for an early lunch. They piled tons of gyro meat on it (score!) and the bread that came with it was so crunchy and good! The bread wasn't the usual pita bread, but this change was a good one. I almost ate the whole basket!


The only cooking I did this weekend was making Monday's lunch (hehe), which was Honey Mint Glazed Chicken (from Simply Recipes). I found this website one day just being bored at work and surfing the web. It's a great food blog where the owner of the blog, Elise, shares her recipes. She has everything from entrees to appetizers to desserts. She also categorizes it by the types of ingredients, low-carb, occasions, etc. And it's fairly... simple!


Started out with 4 pieces of chicken - 2 legs, 2 wings. I marinated the chicken with white vinegar and OO as the recipe had called it.


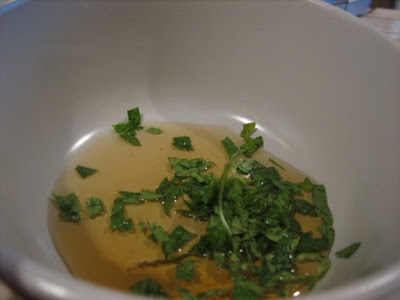
Honey and fresh chopped mint in a bowl, prior to adding water. I loooove fresh mint. And growing it in my backyard is really fun too!


I chose to bake my chicken (instead of grilled) in the oven for 475 degrees for 20 minutes. I then took it out and glazed it with the honey mint mix. It was pretty hot that some juices splattered on my hands!


Back in the oven it goes for another 10 minutes.


The result - delicious honey mint glazed chicken. It was so simple and yum!