Wednesday, December 1, 2010

Slow Roasted Pork with Carrots and Winter Melon

As I mentioned a couple of posts ago, I felt adventurous during the Thanksgiving weekend and whipped up a couple of items I never tried cooking before.  This is a typical Chinese slow roasted meat dish that I love, from it's tender "melt in your mouth" meat to the combination of spices that makes the drippings a "must-spread" on a pile of hot white rice.  I was inspired to make this dish while doing some winter cleaning of my kitchen cabinets when I found packets of spices received from my dad awhile back on his trip from Taiwan.  At the time, I just took whatever he tossed my way, not knowing what it was or what to do with it.  I gave a call to my mom to ask what I can do with these packets, and she informed me that I can use it to slow cook any kind of meat!  "Well, why not!" I said, since I have a whole Sunday to myself.  And thanks to my green-thumbed friend EH, I was able to add winter melon freshly picked from her garden just the day before.  The melon made the dish that much more delicious. 

Slow Roasted Pork with Carrots and Winter Melon

Ingredients
- 1/2 lb. of pork shoulder pieces, cut into 1-2 inch cubes
- 1 Tbsp olive oil
- 1 Tbsp soy sauce
- 1 Tbsp dark soy sauce
- 2 tsp salt
- 1 Tbsp rice wine (can use sake)
- 1 tsp sugar
- 2 cups of water
- 1 packet of "spice pouch" (contains cinnamon, star anise, fennel, clove, and zanthoxylum. Although this packet was brought back from Taiwan, I am pretty sure you can find it at a Chinese supermarket here in the States.)


- 2 carrots, peeled, roughly cut into cubes
- Half of a winter melon, peeled, roughly cut into cubes

Tools
- iron cast pot

Steps
1. Heat olive oil in the crock pot and toss in pork shoulder pieces.  Saute for 5 minutes until meat is lightly browned on the outside.  Add both soy sauces, rice wine, salt, and sugar and saute for a couple of more minutes.

2. Add in water and the spice pouch.  Bring the pot to boil and then simmer for an hour.  Stir meat once in awhile during this time.

3. Turn the heat up to medium-high and add in carrots and winter melon.  Stir meat and vegetables until all vegetables are covered in sauce.  Cook for another 15 minutes, or until the carrots and winter melon are semi-soft.  If needed, salt to taste.

Tuesday, November 30, 2010

Sweet Red Bean Soup (紅豆湯)

A favorite of mine during the winter time, this warm sweet red bean (aka 紅豆 or azuki bean) soup with homemade glutinous rice balls (湯圓, made pink and white just like ones you can buy at the store!) reminds me of the cold winters when I was young, and brings a smile to my face... probably due to the side effect of a slight sugar high!
Sweet Red Bean Soup (紅豆湯)

Ingredients
Soup:
- 1/2 cup dried red beans, rinsed
- 3 cups of water for boiling the beans; 2 cups for the soup
- 2 blocks of Chinese brown sugar


Glutinous Rice Balls:
- Two 3/4 cup of glutinous rice flour (糯米), separated into 2 bowls


- 1 tsp red food coloring
- warm water

Steps
1.  Rinse the red beans and place beans and 3 cups of water in a pot to boil.  Once it boils, bring the heat down to low and let it simmer for about 2 to 2.5 hours (yes, these darn beans are super hard and takes a long time to cook!).  Stir beans occassionally.  Note: ensure water is not being boiled off too quickly!

2.  Meanwhile, make the glutinous rice balls by placing 3/4 cup of glutinous flour in a bowl.  Do this again for the second bowl. 

3. Make the white rice balls first by placing about 1 Tbsp of warm water in the bowl and mix with a spoon.  Mix well until a dough forms.  Add flour or water, as needed.  Pinch a small piece from the dough and rub softly against the palms of your hand to roll into a small ball.  Place the ball on a floured plate, separated out and not touching each other.  Repeat until all dough is used to make small rice balls.

4.  Make the red glutinous rice balls by adding 1 tsp of red food coloring to the second bowl of glutinous flour.  Repeat Step 3 above.

5. Immediately place the rice balls in the freezer to freeze (still ensure each rice ball is on the floured plate and not touching each other).
(Pile of rice balls after they are frozen)

6. Once the red beans have been thoroughly cooked and is soft, add about 2 or more cups of water (a lot of the water have been cooked off, so you want to replace them).  Place 2 blocks of Chinese brown sugar (if this is too sweet for you, add some more water).  Cook until brown sugar dissolves.

7. In a separate pot, bring water to boil and toss in the frozen glutinous rice balls.  Cook until all rice balls float to the surface of the water.  Scoop about 2-3 spoonfuls of red bean soup into a bowl.  Using a slotted spoon, scoop desired amount of rice balls and place in the soup bowl.  Now enjoy!

*For the remaining rice balls, use the slotted spoon and place them in the pot of red bean soup.  The next time you enjoy the dessert, the soup and rice balls can be heated up together.

Monday, November 29, 2010

Chocolate Chip Banana Pumpkin Muffins

I like making muffins.  Lately I've been making a habit of making muffins on Sundays as a way to entertain myself (it's been "Football Sunday", which means I get the whole day to myself while the hubby sits in front of the TV from 8 am to 8 pm) and on the plus side, we end up with muffins for breakfast or a snack for the next few days.

Chocolate Chip Banana Pumpkin Muffins
adapted from http://www.cooks.com/

Ingredients
- 1/2 cup canned pumpkin
- 2 medium overripe bananas, mashed
- 1/2 cup sugar
- 1/4 cup milk
- 1/4 cup vegetable oil
- 1 egg
- 1/3 cup semi-sweet chocolate chips
- 1 3/4 cup all-purpose flour, sifted
- 2 tsp baking powder
- 1/2 tsp cinnamon
- 1/2 tsp nutmeg
- 1/2 tsp salt

Tools
- muffin pan
- mixer
- cookie dough scoop (optional)

Steps
1. Preheat oven at 375 degrees.

2. Mix mashed banana, pumpkin, sugar, milk, oil and egg in mixer until well blended.  Pour in the chocolate chips.

3. In a separate bowl, combine sifted flour, baking powder, cinnamon, nutmeg, and salt.

4. Pour dry ingredients into wet ingredients and combine just until mixed (don't over mix!).  Spoon (use a cookie dough scoop if you have one, they are great!) into greased muffin tins.  Bake for 20 minutes or until toothpick inserted into muffin comes out clean.

Makes 12.

A few tips...
...you can make mini muffin by using a mini muffin pan!  If you don't want to end up with tons of mini banana pumpkin muffins, you can reduce the recipe by half and can probably get close to about 24 mini muffins.
...you can add anything extra as desired, such as pecans, walnuts, or dried cranberry.

Sunday, November 28, 2010

Banana Cake Roll

This Thanksgiving weekend went by fast (don't they all...) and I'm really dreading going back to work tomorrow.  I ate a lot, I went crazy during Black Friday shopping (10 pm on Thanksgiving night until 7 am, baby!), and I also enjoyed a few exciting cooking adventures!  I whipped up this Banana Cake Roll for a quick gathering of light eating (although that is never possible with us) and movie-watching at a friend's this past Saturday.

I followed the recipe step by step, so please click here if you want to make this.  I was a bit nervous in making this dessert because one, I suck at baking, and two, this cake calls for delicate rolling of cake.  I foresaw a big disaster coming my way (cake cracking and pieces falling, sticky cream cheese frosting all over, you get the picture...) but it wasn't hard at all!  It's a very easy and simple recipe.  And yum!

Banana Cake Roll


Friday, November 5, 2010

Just Pictures: A Six-Course Meal Deal!

Thanks to BloomSpot, we celebrated our 5-year anniversary yesterday "with style" with a Six-Course Meal for Two for $99 (valued at $170!).  We went home full but not painfully stuffed, satisfied, and happy...
 Chef's complimentary starter - Mushroom Soup and Fried Chorizo Wonton
Hokkaido Scallop Crudo (salmon tartare, crème fraiche, green apple, horseradish & lemon)
Smoke Trout (gingered beets, crème fraiche, orange)
Soup of Potimarron Squash with "Mole" Spices
Wild King Salmon (fingerling potatoes, chorizo, saffron)
Slow Roasted Leg of Lamb (pistachio polenta, lacinato kale, tomato relish, black olive jus)
Warm Chocolate Truffle Cake (condensed milk, vanilla crisp, butterscotch ice cream)
Huckleberry Beignets with Lemon Curd
Happy Anniversary to us! 
We even made a wish and blew out our candles! :))
Marche // Menlo Park, CA

Tuesday, November 2, 2010

Chicken Stock

Making chicken stock is like knowing how to tie your shoes or drive a car - it is a necessity to (well, for carnivores) cooking.  I use chicken stock in most of my cooking as it adds that extra flavor than plain water would, and I just love it for any Asian noodle soups.  It's easy to make because you can just leave it for hours to simmer while you go off to do something else!

Chicken Stock

Ingredients
- 2 large chicken leg quarters
- 3 quarts of water
- 1/2 yellow onion, roughly chopped
- 3 stalks of celery, cut into 4 pieces
- 1 carrot, rough chopped
- 1 bay leaf
- 1/2 tsp black peppercorns
- salt to taste

Tools
- stockpot
- colander

Steps
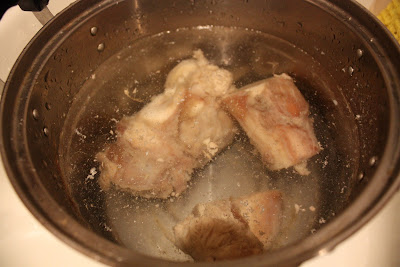
1. Chop up chicken quarters into 3 inch chunks (this makes it easier to cook the meat).  Place chicken pieces in a large stockpot with enough water to cover. Bring to boil over high heat and cook for 5 minutes to get rid of blood particles. Drain, reserve the meaty bones, and rinse the pot well.
2. Return chicken pieces to the same stockpot, add 3 quarts of water, onions, celery, carrots, bay leaf, and black peppercorns.  Bring to boil over high heat, and then reduce heat to low.  Let simmer for 3 hours until around 2 quarts.  Ocassionally skim off any foam from the surface.  Salt broth to taste.  Strain and discard solids, reserving the meaty bones to pick on if desired.
Yields about 2 quarts
 
A few tips...
...cool the stock first before draining.  From experience (sadly), you don't want hot steam hitting your face if you are pouring when the stock is still boiling hot!
...if you are using this chicken stock for soup or noodle soup, reserve the chicken meat.  Peel meat off the bones and place back into the stock.  This way you can get extra protein!
...you may not be able to use all the chicken stock in one sitting, so save some in a container and put it in the freezer.  To be safe, the stock can be good up to about 2-3 weeks.  Take it out to defrost when needed.

Tuesday, October 26, 2010

Teriyaki Chicken and Udon (Victory Noodles?)

This past weekend was a free weekend for us in quite awhile.  No obligations, no going to SF to visit the in-laws, no going to Sunday dinner with my side of the family, and the rain was more of a reason to stay in and do nothing.  Not having done grocery shopping for more than a week, it was pretty slim pickings in the kitchen.  Did I wanted to brave the wind and rain and go out to gather more fresh ingredients?  Nahhh... I decided to scrounge up what I can, which resulted in this udon dish.

Thank goodness, the end result was surprisingly good.  I may even dare to dub these "Victory Noodles" because we enjoyed scarfing this down while watching the SF Giants win to go on to the World Series!  For the hubby: Go Giants!!!

Teriyaki Chicken and Udon
Ingredients
Teriyaki Chicken:
- 2 pieces of chicken breast, cut into cubes
- 1/4 yellow onion, sliced
- 1 clove of garlic, minced
- 2 Tbsp teriyaki sauce (I used Soyaki from "Trader Joesan", I highly recommend this sauce!)
- 1 scallion, chopped
- 1 Tbsp olive oil
- salt and pepper

Udon:
- 2 packs of udon noodles, frozen (make sure the noodles are frozen when placed into the water to cook, this way the noodles are firm (or "Q Q the") when done!)
- 1/2 tsp Hon Dashi Bonito Fish Soup Base


Tools
- pan or wok

Steps
1. Place chicken, onion, garlic, and Teriyaki sauce in a bowl and mix well.  Put aside to let it marinate for about 20 minutes.  Chop scallions in the meantime.

2. Heat a pan or wok on high heat with 1 Tbsp olive oil.  Saute the marinated chicken for about 10-15 minutes until done.  Salt and pepper to taste.

3. Fill a pot with water and place on high heat.  Once boiling, place the frozen udon noodles and cook for 2-3 minutes.  The water may not be boiling after two minutes, but the noodles are cooking, don't worry!  Take out the noodles and place into a bowl.  Add bonito fish soup base and mix well.  Place udon first on a plate and then teriyaki chicken on top.

Serves 2

Monday, October 25, 2010

Apple Galette - The "Low Maintanence" Apple Pie

Want a simple dessert recipe that can be whipped up in about 20 minutes?  Any cravings for apple pie?  Well, this apple galette recipe from Pinch My Salt is your solution!  So instead of reposting the recipe here, the link provides wonderful instructional pictures and lots of tips for non-bakers (love this site!).

I enjoy making this apple galette from time to time because really, it is SO SIMPLE!  All you need is all-purpose flour, cold butter, a few spoonfuls of ice cold water, salt, apples, and sugar (cinnamon optional, but really adds that extra touch), and you can get an apple pie in less than an hour.  An apple galette is smaller than an apple pie, so you won't feel as guilty eating it for dessert.  Comon, you know you want some...

A slice of apple galette with Honey Lavender ice cream from Bi-Rite Creamery.

Sunday, October 24, 2010

Phở (Vietnamese Beef Noodle Soup)

I love noodles.  Soup noodles, stir fried noodles, or pasta... yum yum yum!  A few months ago while "toy shopping" at Sur La Table, I found the cookbook Noodles Every Day by Corinne Trang.  It was even on sale, so I had to get it!
This cookbook contains noodle recipes from almost every region of Asia, from Chinese to Korean, Japanese to Vietnamese.  After quickly scanning the book, I knew the first recipe I wanted to try was Phở.


Phở (Vietnamese Beef Noodle Soup)
from Noodles Every Day, by Corinne Trang

Beef Stock
Ingredients
- 2 lbs raw meaty beef bones, such as oxtail or short ribs
- 3 quarts of water
- 1/2 large yellow onion
- 4 whole cloves
- 4 whole star anise
- 1 four-inch cinnamon stick
- 3 slices of ginger
- 4 scallions, trimmed and crushed
- 1 Tbsp fish sauce
- 2 tsp sugar
- 1/2 tsp white or black peppercorns
- salt to taste

Tools
- stockpot
- colander

Steps
1. Put beef bones in a large stockpot with enough water to cover.  Bring to boil over high heat and cook for 10 minutes to get rid of bone and blood particles.  Drain, reserve the meaty bones, and rinse the pot well.

2. Return the beef bones to the same stockpot, add 3 quarts of water, and bring to boil over high heat.  Reduce heat to low and add onions, cloves, star anise, cinnamon, ginger, scallions, fish sauce, sugar, and peppercorns.

3. Simmer, partially covered, for 4-5 hours, until reduced to about 1.5 to 2 quarts.  Ocassionally skim off any foam from the surface.  Salt broth to taste.  Strain and discard solids, reserving the meaty bones to pick on if desired.

Yields 1.5 to 2 quarts

Phở 
Ingredients
- 8 oz dried narrow flat rice sticks, soaked in water until pliable (I used the Three Ladies Brand, Rice Stick (S) - small)


- about 1 lb eye of round steak, thinly sliced (in my opinion Japanese supermarkets has a higher quality of meat, so I used shabu shabu meat in this case.  It was the best decision!  The quality of the meat and the spices of the soup was a wonderful combo.)
- 1.5 to 2 quarts of Beef Stock
- fish sauce or salt to taste
- 1/2 yellow onion, thinly sliced
- 1 cup mung bean sprouts
- 1 lime, quartered
- 1 bunch fresh Thai basil or cilantro
- Hoisin sauce for serving (optional)
- chili-garlic sauce (eg. Sriracha) for serving (optional)

Steps
1. Bring a large pot of water to boil and cook the noodles until tender yet firm, about 10 seconds.  Drain and divide among bowls.  Layer a few beef slices over the noodles.

2. Meanwhile, in another large pot, bring the beef stock to a gentle boil over medium heat.  About 5 minutes before serving, add the onions and adjust seasoning with fish sauce or salt, if necessary.  Right before serving, raise the heat to high and bring the broth to a full boil.

3. Place mung bean sprouts, lime, and Thai basil or cilantro in a plate.  Bring to table so that each person can add vegetables to their noodle soup as desired.

4. Ladle the boiling hot broth along with onion slices over the beef and noodles, making sure to cover beef and noodles.  Serve with hoisin sauce and chili-garlic sauce if desired.

Serves 4

Saturday, October 23, 2010

Arroz Con Pollo

I know, it's been a loooong while since I posted.  Things (mostly work, argg) have been crazy... so crazy that my kitchen was collecting dust for a few months.  So sad, so sad...

I actually made the below dish awhile back when things were "sane" and just never got the chance to share it.  What I love most about this dish is the chicken flavors and fat cooked into the rice.  If you want a hearty warm meal (really perfect for the fall weather right now...), then give this dish a try!


Arroz Con Pollo
from Simple Recipes

Ingredients
Chicken:
- 1 Tbsp olive oil
- Half of a whole chicken (chicken wings, thighs, breast)
- 1/2 cup flour for dredging
- salt, pepper, and paprika for flour
Rice:
- 2 Tbsp olive oil
- 1/2 yellow onion, chopped
- 1 garlic clove, minced
- 2 cups of medium or long grain white rice
- 3 cups of chicken stock*
- 1 Tbsp tomato paste or 1 cup of fresh diced tomatoes or canned tomatoes
- pinch of oregano
- salt to taste

*Check the instructions on the rice package for the proportions of liquid to rice.  They can range from 1:1 to 2:1.  If your rice calls for 2 cups of water for every cup of rice, then for this recipe, use 4 cups of stock for 2 cups of rice.

Steps
1. Heat 1 Tbsp olive oil in a large skillet (a skillet that has a cover) on medium high heat. Put the flour in a wide bowl, mix in a generous sprinkling of salt, pepper, and paprika. Dredge the chicken pieces lightly in the flour mixture and put in the pan to brown. Cook a few minutes on each side, just enough so that the chicken has browned. Use a slotted spoon to remove from pan and set aside.

2. Add the rice to the pan to brown. Add a little more olive oil if necessary. Stir first to coat the rice with the olive oil in the pan. Then don't stir too much or you will prevent it from browning. Let it brown and then stir a little to let more of it brown. Then add the onion and garlic. Cook the onion, garlic and rice mixture, stirring frequently, until the onions have softened, about 4 minutes.

3. Place the chicken pieces, skin-side up, on top of the rice. In a separate bowl, mix together the stock, tomato, salt, and oregano. Pour the stock mixture over the rice and chicken. Bring to a simmer, reduce the heat to low, and cover. Cook for 20-25 minutes, depending on the type of rice and the instructions on the rice package, until the rice and chicken are done. Fluff the rice with a fork. Add more salt and pepper to taste.
Serves 2-4.

Wednesday, June 2, 2010

Just Pictures: Euro-Asian Cuisine In Suburbia

A surprisingly delicious Asian fusion cuisine in the heart of the San Jose suburbs.  I was quite delighted.

Vegetarian Fried Wontons (contains bean curd and other Asian veggies)
Garden Mixed Greens Salad with Asian Pear (so simple yet so refreshing!! my favorite of the night!)
Filet Mignon in Mushroom & Cabernet Sauce (a perfect medium rare steak)
Tea-Smoked Duck with Taro & Sweet Potatoes Au Gratin (tender duck, although the cranberry sauce was a bit too sweet)
Vegetarian Wellington (with tofu, onion, mushroom, jicama, baby spinach, wrapped in puff pastry)
Raspberry Rum Custard Cake
Elements // San Jose, CA

Saturday, May 15, 2010

Bacon-Wrapped Trout

It may be somewhat a daunting task to cook a whole, bone-in fish, but luckily, I discovered that it was quite the opposite!  No matter how you look at it, fish is easy to cook.  Season it with some salt and pepper, sprinkle with lemon or lime juice and some herbs, toss it on a grill or put it in an oven, and in 10 to 15 minutes, your meal is ready.  Sounds easy right?

I came across trouts one day at the supermarket since they were having a sale.  I looked at this fish, right in the eyes, and debated for a few minutes if I should dare to try to cook this.  I thought to myself, "It would be kind of gross to touch this fish, as it is whole and the head is still attached, but I did promise myself that we should eat more fish.  We really don't eat enough fish.  Wait, but that's really not my fault because I love salmon, but the husband does not.  Darn, I wish we can eat salmon..."  Well, I digress..., but because of this fact, I braved the thought of holding the fish in my hands and bought it for dinner that night.

After opening the package and washing the trout thoroughly with cold water, I opened up the pre-cut flap at the fish's stomach area and saw that the guts were removed (thank god).  However, the spine and tiny bones were still attached.  In order to make this dish more pleasant and enjoyable, so that we can eat more fish in the future (do you sense that the hubby is a picky fish-eater?? hahaa), I decided to take out the spine and bones with a small paring knife.  I ended up with bruised fingers and a sore back, because this process took a bit longer than I anticipated, but the end result was nice because we did not have to be as cautious swallowing the meat during the meal.


Bacon-Wrapped Trout

Ingredients
- 2 trout, about 1 lb. per fish
- 8-10 slices of bacon (thick bacon recommended), about 4-5 slices per fish
- 1 small lemon, sliced
- 2 tsp Italian herbs mix (1 tsp per fish)
- 1 tsp dried parsley or 1 Tbsp fresh parsley (1/2 tsp dried per fish, 1/2 Tbsp fresh per fish)
- 2 tsp olive oil (1 tsp per fish), and about 1 Tbsp for the grill (or you can use Pam for the grill)
- salt
- freshly ground pepper

Tools
- grill, outdoor or over the stove top
- paring knife (optional)
- toothpicks (optional)

Steps
1. Wash the trout with cold water and pat dry.  Optional: remove the spine and bones for ease of consumption.  Start with the spine by using the paring knife and cutting and breaking the spine from one end of the fish.  As you remove the spine, use your finger to pick at the bones connected to the spine and remove them from the meat.
2. Generously season the entire fish with salt and pepper, inside and out.

3. Season the internal fish with herbs and 1 tsp of olive oil, and place lemon slices on the inside.  Ensure the lemon slices are small enough so that you can close the area.  It would be difficult to wrap the fish with bacon if the lemon slices are falling out of the fish!

4. Wrap each trout with 4-5 slices of bacon.  Warning: most likely, the bacon slices will not firmly stay on the fish, so you can use toothpicks to hold them in place by threading them through the bacon.

5. Pre-heat the grill and coat the grill with 1 Tbsp of olive oil, or spray with Pam.  Transfer the fish to the pre-heated, pre-oiled grill.  Be careful when you transfer because the bacon slices may fall off the fish.
 6. Grill the trout for about 10 minutes.  If you are using an outdoor grill, covered the grill for added heat.  Check after 10 minutes to see if the fish is done.  If not, continue to grill for a 2-3 minutes and check again.

Serves 2-4.

Thursday, April 15, 2010

Just Pictures: Kushiyaki Goodies

Yaki Onigiri (grilled rice ball)

Non-Grilled Items:
Fresh Chicken Spring Rolls
Sumika Salad
Tsukune-Don (ground chicken & egg over rice)
Sumika // Los Altos, CA
(photos courtesy of EH)